
A digital travel scrapbook is a trip-journal feature inside a travel-planning app that stores your photos, notes, maps, and day-by-day memories linked directly to your itinerary. To create one now: capture a photo or voice note, link it to the matching itinerary day or location, then back it up to the cloud before you sleep.
Your core scrapbook elements are:
- Hero photo per activity or place
- Short caption (who, what, why it mattered)
- Location pin tied to the itinerary stop
- Ticket or receipt scan for that day's entry
- Voice note (15–30 seconds) capturing mood or a funny moment
- Short video clip (5–15 seconds)
That's the whole system. Everything else is refinement.
Key Takeaways
A digital travel scrapbook works best when it lives inside your itinerary app, with every photo, note, and voice entry linked to a specific day and place.
| Point | Details |
|---|---|
| Link memories to itinerary days | Attach every photo and note to a specific day entry so memories are searchable by date and place. |
| Capture daily in 5–10 minutes | Short daily captures preserve emotional detail better than one long session at trip end. |
| Enable offline sync and backup | Set auto-sync and export a ZIP archive at trip end to protect every entry. |
| Use one template per trip | Consistent prompts across all days create a coherent narrative you'll actually want to read later. |
| Planytera as your all-in-one tool | Planytera combines AI itinerary planning with a built-in journaling option, offline access, and shareable TripBooks. |
Table of Contents
- What does an itinerary-linked digital travel scrapbook actually do?
- What should you actually save during the trip?
- How do you attach photos and notes to specific itinerary days?
- How do you keep the scrapbook organized and easy to search?
- How do families and groups journal together without creating chaos?
- What about offline capture, backups, and privacy?
- How do you turn scattered notes into an actual story?
- Three ready-to-use workflows: solo, family, and group
- How Planytera supports your itinerary-linked digital travel scrapbook
- Why itinerary-linked journaling is the method that actually sticks
- Planytera makes your first TripBook easy to set up
- Selected sources and further reading
What does an itinerary-linked digital travel scrapbook actually do?
Think of your personalized travel itinerary as the spine of a book. Each day is a chapter, and your memories slot into the right page automatically. That's what separates an itinerary-linked trip journal from a generic photo album: every entry has a date, a place, and a plan attached to it.
The practical benefits are real:
- Searchability: Find "that amazing taco stand in Day 3" in seconds instead of scrolling 400 photos.
- Automatic timestamps and GPS: Your phone does the filing for you.
- Group collaboration: Families and travel groups can each add entries to the same shared TripBook.
- Trip continuity: If your plans change mid-trip, your memories update with them.
- Reliving the trip: Travel journaling reduces stress and helps prevent post-trip blues by extending positive emotions long after you're home.
Pro Tip: Write one sentence about why you took each photo, not just what's in it. Research shows that pairing photos with written context improves memory retention better than photos alone, countering the "photo-taking impairment effect."
What should you actually save during the trip?
Speed matters when you're traveling. The goal is a quick capture during the day, not a writing session. Aim for 5–10 minutes of daily short captures rather than one long nightly dump. Quality beats quantity every time.
Must-capture items per activity:
- One hero photo (the moment, not just the landmark)
- A 1–2 sentence caption: who was there, what happened, how it felt
- Location pin (tap to confirm the GPS tag)
- Ticket, boarding pass, or receipt photo
- A 15–30 second voice note while the feeling is fresh
- One short video clip for motion and sound
Metadata worth adding manually: mood, estimated cost, names of travel companions, and a one-word theme tag (food, hike, culture, rest).
Frequency guide: Quick taps throughout the day, then a 5–10 minute nightly recap to fill in captions and assign entries to the right itinerary day.
Pro Tip: For families, hand a child the voice-note button and ask one question: "What was the best part today?" Kids' unfiltered answers become the most memorable entries in the whole TripBook.
How do you attach photos and notes to specific itinerary days?
Linking memories to your itinerary is a four-step loop you can repeat every evening:
- Capture photos, voice notes, and scans throughout the day using your travel memories app.
- Assign to a day by opening that day's itinerary entry and attaching your media directly to it.
- Tag by location and theme (e.g., "Rome / food / Day 2") so the entry is findable three ways.
- Sync when you're back on Wi-Fi; confirm the cloud backup before you close the app.
A few extra moves that pay off:
- Pin photos to map locations if your app supports it. Seeing memories on a map view is one of the fastest ways to relive a trip.
- Attach receipts and tickets to the matching day entry, not a generic "documents" folder.
- Tag participants so group members can filter to their own highlights.
- If photos are out of order, use bulk-assign by timestamp or drag-and-drop to the correct day.
Itinerary containers with context-sensitive prompts make this even faster: the app surfaces the right capture suggestion at the right moment in your day.
How do you keep the scrapbook organized and easy to search?
A digital travel binder becomes a photo dump the moment you stop naming things consistently. A simple taxonomy prevents that.
Recommended layers:
- By day: Day 1, Day 2, etc. (automatic if linked to the itinerary)
- By place: City or neighborhood name
- By theme: Food, hike, museum, rest, transport
- By person: Useful for group trips where each contributor tags their entries
Naming convention for albums and exports: YYYY-MM-DD_City_Event (e.g., 2026-06-14_Lisbon_BeleemTower). Consistent naming makes ZIP exports and printed photo books sort correctly without manual cleanup.
Map view vs. timeline view: Map view is best for "where did we go?" retrieval. Timeline view is best for "what happened on Tuesday?" Use both; they answer different questions. Tags and albums fill the gaps when neither view is granular enough.
Pro Tip: Save a one-sentence naming guide as a note inside the trip itself. Something like: "Tag format: City_Theme_DayNumber." Anyone joining the shared TripBook later will follow the same system without asking.
How do families and groups journal together without creating chaos?
Shared journaling works best when roles are clear from day one. Family-focused digital journals work well when they support voice recordings, maps, and multiple media types, because those features lower the barrier for kids and less tech-savvy travelers.
Three sharing models that work:
- Single shared TripBook: Everyone adds entries in real time. Best for small families where trust is high and editing conflicts are unlikely.
- Per-person drafts, merged nightly: Each traveler captures independently; one designated editor reviews and merges entries each evening. Best for groups of 4 or more.
- Role-based contribution: Some members are editors (can write and publish), others are contributors (can add draft entries only). Keeps the final narrative consistent.
Permission tips: Limit full editing rights to one or two people. Use draft-entry mode for everyone else so nothing goes live without a quick review.
Device sync: Ask everyone to enable auto-upload and use the same tag format. Duplicate photos are inevitable; flag them during the nightly merge rather than deleting on the spot.
For kids: Voice prompts are faster than typing. Ask one question per day and record the answer. Features like interactive location mapping and voice recordings keep children engaged and make their contributions genuinely memorable.
What about offline capture, backups, and privacy?
You won't always have Wi-Fi. Plan for it.
Offline capture: Most travel apps cache media locally. Set a manual sync schedule (every evening when you're back at the hotel) and do a full sync before you board a flight.
Backup strategy:
- Export a ZIP of all media plus JSON metadata at the end of each trip.
- Keep a local copy on your device and a cloud copy in your preferred storage.
- Photographing physical ephemera like tickets and handwritten notes adds a redundancy layer and preserves tactile items digitally.
Export formats and when to use them:
- PDF: Best for sharing a readable trip summary with family.
- EPUB: Good for long-form reading on an e-reader.
- ZIP (media + JSON): Best for archiving and data portability.
Privacy controls: Use account-level privacy settings to keep trips private by default. Share via private invite links rather than public URLs. Enable a device passcode for offline access.
Storage management: Archive completed trips to free up active storage. Subscription tiers determine how much cloud storage and which export formats are available to you.
How do you turn scattered notes into an actual story?
Raw notes and photos are ingredients. Templates turn them into something worth reading later.
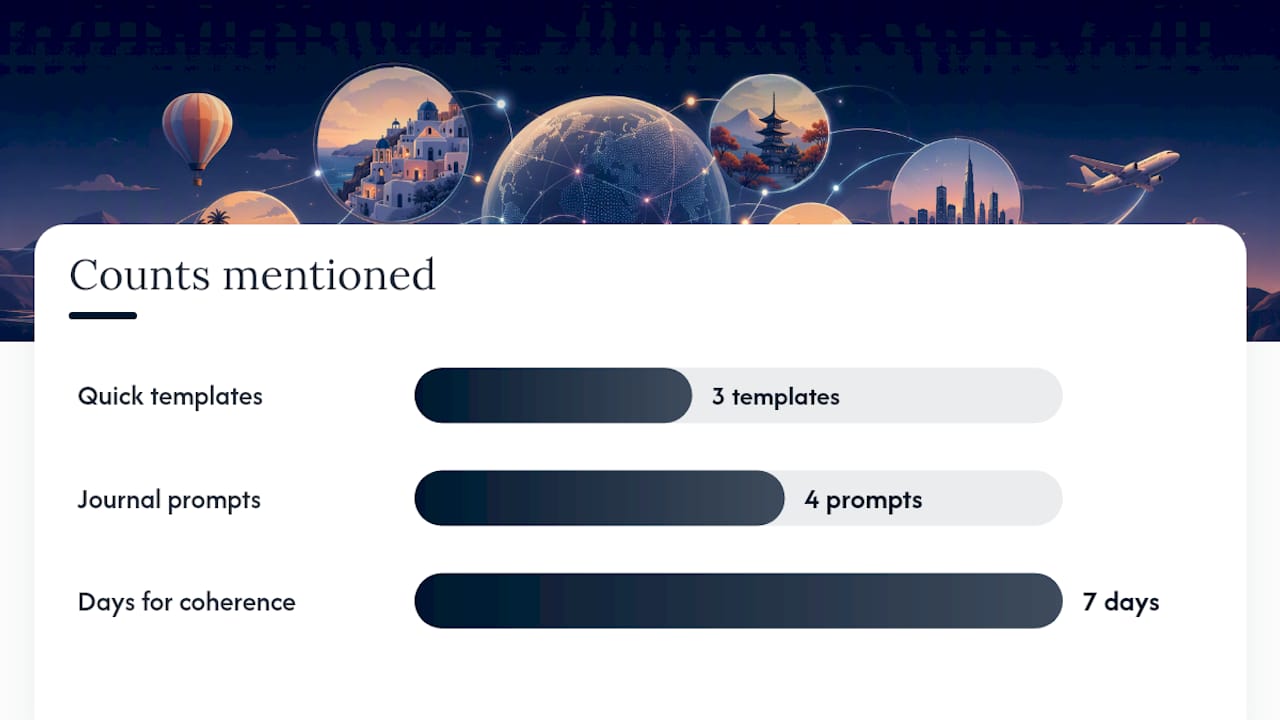
Three quick templates:
- Single-day recap: "Today we [activity]. The highlight was [moment]. One thing I didn't expect: [surprise]."
- Micro-story (3 sentences): What happened. How it felt. One sensory detail (smell, sound, texture).
- Family voice: Each person answers one prompt; the editor stitches the answers into a single entry.
Journal prompts that work:
- "What surprised you today?"
- "One small kindness I noticed."
- "A smell or sound I'll still remember in a year."
- "The moment I almost didn't do, but did."
Pair a voice note with a written caption for layered storytelling. The voice note captures emotion; the caption captures fact. Together they're richer than either alone. The hybrid method of fast digital capture plus slower reflective writing gives you both speed and depth.
Pro Tip: Pick one template per trip and stick to it. Consistency across 7 days of entries creates a coherent narrative arc. Switching templates mid-trip produces a scrapbook that reads like three different people wrote it.
Three ready-to-use workflows: solo, family, and group
Solo traveler
- Capture fast during the day (photo + 15-second voice note per activity).
- Spend 5–10 minutes each evening assigning entries to the right itinerary day and adding captions.
- At trip end, export a PDF for personal archive and select highlights to share publicly.
Family with kids
- Assign roles: One adult is the photographer, one handles receipts and tickets, kids own voice notes.
- Use one question per day as a voice prompt for children.
- Schedule a 10-minute nightly merge: review drafts, resolve duplicates, publish the day's entry.
Group trip
- Create a shared TripBook and assign one editor.
- All contributors tag entries with their name and a theme tag.
- The editor does a final review at trip end, removes duplicates, and exports the finished TripBook as a PDF for the group.
Checklist for all three: Capture → Assign to itinerary day → Tag → Review → Export/Share.
How Planytera supports your itinerary-linked digital travel scrapbook
Planytera is an AI-powered trip planner that generates personalized day-by-day itineraries and includes a journaling option, offline access, and live guidance built into the same app. Your itinerary days are the containers; your memories slot in automatically.
Feature match to the workflows above:
- Itinerary days as containers: Every journal entry attaches to a specific day and activity.
- Offline capture: Save photos, notes, and voice entries without Wi-Fi; they sync when you reconnect.
- Map pins: Pin memories to exact locations on the trip map.
- Shareable TripBooks: Invite family or group members with role-based permissions.
- Live guidance: Real-time advisories and editable plans mean your journal stays accurate even when the trip changes.
Planytera's AI preference learning personalizes journaling prompts based on your stated interests and travel behavior, so the app suggests the right capture type at the right moment. Tagging your traveler preferences also shapes which prompts surface during the trip.
To start a TripBook in Planytera: Open your itinerary, tap the journal icon on any day, add your first entry (photo, caption, or voice note), and enable offline sync in settings. Your memories are now linked to your plan from day one.
Pro Tip: Dom, Planytera's travel blog author, covers the psychological and practical case for itinerary-linked journaling in depth at How Travel Journaling Enhances Your Trips. Worth reading before your next trip.
Why itinerary-linked journaling is the method that actually sticks
Most travelers start a travel journal with good intentions and abandon it by Day 3. The reason is almost always friction: the journal lives somewhere separate from the plan, so capturing a memory means switching apps, re-entering context, and doing extra work.
Linking the journal to the itinerary removes that friction entirely. The day is already there. The location is already tagged. You're just adding a photo and a sentence to something that already exists. That's the difference between a habit that sticks and one that doesn't.
The deeper benefit is retrieval. A scrapbook you can search by day, place, and theme is genuinely useful years later. A folder of 800 unnamed photos is not.
Planytera makes your first TripBook easy to set up
Your itinerary and your memories belong in the same place. Planytera gives you both in one app, with no extra tools or workarounds needed.
Get started in five steps:
- Create your Planytera account at Planytera.
- Open or generate your itinerary.
- Tap the journal icon on Day 1 and add your first entry.
- Invite travel companions and set their permissions.
- Enable offline sync so you never lose a capture.

Check the subscription plans to see which tier unlocks advanced export formats and extended cloud storage. A free tier is available to get you started right away.
Selected sources and further reading
- What Is a Personalized Travel Itinerary? — Background on using itinerary structure as the organizing container for trip memories.
- Why You Should Keep a Travel Diary — Research-backed overview of journaling's stress-reduction and memory benefits.
- The Hybrid Travel Journaling Method — Practical guide to combining fast digital capture with reflective analog processing for richer memories.